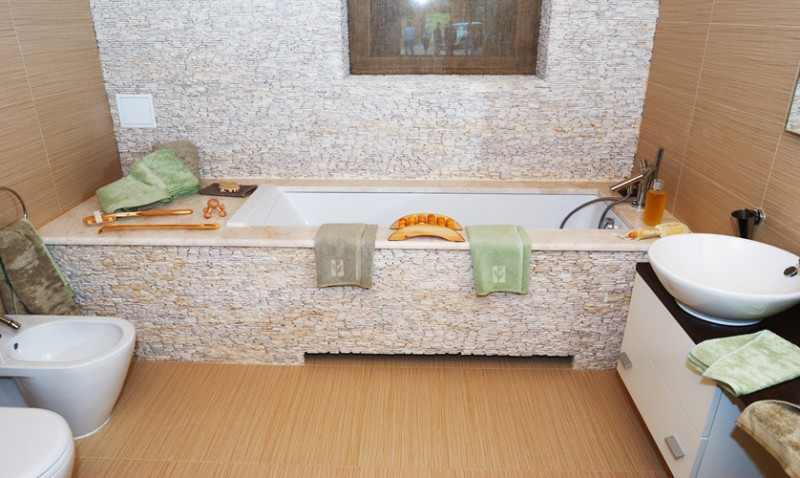
When it comes to designing or renovating your bathroom, there’s much more to the process than simply picking out attractive tiles or glossy fixtures. One crucial aspect that’s often overlooked is what goes on behind the tiled panels, particularly the proper installation of insulation and uPVC cladding. If you’re a DIY enthusiast, a young professional redecorating a new flat, or even a seasoned trade professional, understanding this process can dramatically improve both the performance and longevity of your bathroom. Let's delve deep behind the scenes.
Why Proper Behind-the-Wall Work Matters
Bathrooms are high-moisture environments. Without the correct insulation and wall protection, they can quickly become breeding grounds for mould, mildew and structural damage caused by dampness. That’s why what's hidden behind the tiles is just as important as the finish you see.
Good insulation helps in maintaining thermal efficiency, reducing your home's heat loss while making your bathroom feel cosier — especially important in the UK’s cool and damp climate. On the other hand, uPVC cladding offers waterproof, long-lasting wall protection, creating a barrier that stops water from seeping into vulnerable areas.
Simply tiling on top of plasterboard or bare walls? That’s a ticking time bomb. A well-prepared bathroom wall setup ensures lower maintenance costs and a longer lifespan for your renovation.
Step 1: Start With Moisture-Resistant Wall Preparation
Before installing insulation or cladding, the wall structure must be ready to handle bathroom conditions. Begin by stripping back any existing wall finish to expose the bare wall or stud framework. At this stage, a moisture-resistant plasterboard or a cement-based backer board should be installed to provide a stable and water-tolerant base.
If your walls are timber stud construction (common in UK home extensions and upper floors), pay extra attention to vapour resistance. Always install a vapour barrier on the warm side of the insulation to stop warm, moist indoor air from condensing within the wall cavity.
This base layer is critical — if it fails, you risk damage to insulation, internal structures and the tiles or cladding you've worked hard to install.
Step 2: Installing Thermal and Acoustic Insulation
Once the wall cavity is exposed, it's time to install insulation. Choosing the right type of insulation depends on your goals. If you're looking to increase warmth in your bathroom, thermal insulation products such as PIR (polyisocyanurate) boards or mineral wool are excellent choices. For those in terrace houses or semi-detached homes, sound-proofing can also be beneficial — mineral wool serves both thermal and acoustic purposes well.
The insulation should be cut snugly to fit between the wall studs. Gaps will allow cold air to bypass the insulation, seriously reducing performance. For added performance, consider using insulated plasterboard, which combines thermal insulation with a plaster finish, reducing space loss in tight bathrooms.
Here’s a quick breakdown of insulation options commonly used in bathroom walls:
| Insulation Type | Thermal Efficiency | Water Resistance | Soundproofing |
|---|---|---|---|
| Mineral Wool | Good | Moderate (use with vapour barrier) | Excellent |
| PIR Boards | Excellent | High | Basic |
| Foam Board | Very Good | Excellent | Basic |
Once insulation is fitted securely and appropriately sealed, you’re ready for the next stage — the protective cladding.
Step 3: Benefits of uPVC Cladding Over Traditional Tiles
uPVC (unplasticised polyvinyl chloride) cladding panels are quickly becoming a favourite with both DIYers and professional bathroom installers across the UK. Why? Because they’re lightweight, easy to clean, quick to install and completely waterproof.
Unlike traditional ceramic tiles, uPVC panels don’t require grouting, which not only speeds up installation but also results in fewer places for grime and mould to grow. They’re available in a wide range of finishes — from marble-look gloss to matte, wood-effect panels — aligning perfectly with contemporary or minimalist interiors.
What’s more, they can be installed directly over insulation and plasterboard, reducing the number of steps required in your project. No need for tilers or expensive grout work, making them ideal for quicker turnarounds and budget-friendly refurbishments.
Step 4: Installing uPVC Cladding the Right Way
Start by ensuring your wall is level and secure. uPVC panels typically come with tongue-and-groove fittings, making them easy to slot into place. Begin in one corner of the room and work your way across the wall, fixing each panel with waterproof adhesive or screws as needed.
Don’t forget edging profiles for corners and ends — these create sharp, clean lines and help with moisture resistance. Around baths and sinks, use a high-quality silicone sealant to further prevent water ingress.
If you're installing over insulation or new plasterboard, fix horizontal battens onto the wall to create a stable base for the cladding, especially in cases where the wall surface is not perfectly flat. Battens also allow you to run electrical cables and plumbing behind the cladding with ease, improving the practicality of your bathroom environment.
Future-Proofing with Low Maintenance in Mind
Once your cladding is in place, you can rest easy knowing your bathroom is fortified against common issues like leaks and mould. Unlike tiles — which need regular regrouting and sealant replacement — uPVC cladding requires nothing more than an occasional wipe-down with a damp cloth and non-abrasive cleaner.
This low-maintenance factor is especially attractive to landlords, busy professionals and homeowners who prefer style without compromise. Plus, given Britain's high humidity and often unpredictable weather, anything that guards against moisture and preserves energy should be welcomed with open arms.
Final Thoughts: A Professional Finish Starts Behind the Scenes
Modern bathroom design is as much about function as it is about aesthetics. Insulation and uPVC cladding offer a high-performance, visually appealing combination that increases your bathroom’s thermal efficiency, reduces noise, prevents moisture problems, and offers a timeless, stylish finish.
Whether you’re a young couple buying your first home, a designer updating a flat in a Georgian terrace, or a tradesman looking to impress clients with quality workmanship, remember — it’s what’s behind the tile that counts just as much as what’s on display.
Looking for high-quality uPVC wall panels or insulation products in the UK? Explore our range of professional-grade materials and get expert advice for every stage of your bathroom transformation project.
Trending articles
-
 Handyman Rates and Pricing in 2026: ...
Feb 2026
Handyman Rates and Pricing in 2026: ...
Feb 2026
-
 How to Get More Handyman Services Work ...
Feb 2026
How to Get More Handyman Services Work ...
Feb 2026
-
 How to Choose a Handyman: Questions to ...
Feb 2026
How to Choose a Handyman: Questions to ...
Feb 2026
-
 Signs You Need a Handyman: When to ...
Feb 2026
Signs You Need a Handyman: When to ...
Feb 2026
-
 How Much Does Handyman Services Cost ...
Feb 2026
How Much Does Handyman Services Cost ...
Feb 2026
-
 Handyman vs Specialist Tradesperson: ...
Feb 2026
Handyman vs Specialist Tradesperson: ...
Feb 2026